How to Cook Perfect Bacon in the Oven
How to Cook Perfect Bacon in the Oven
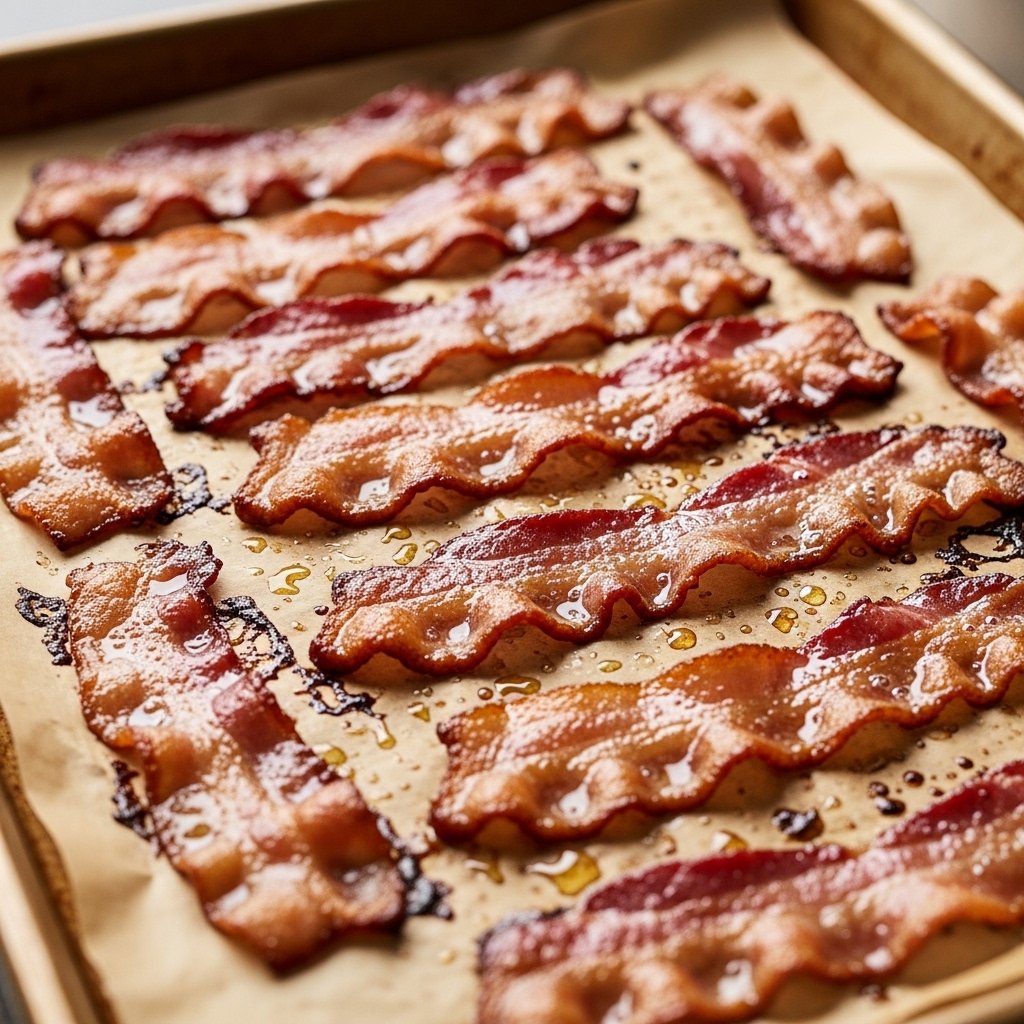
CookCooking bacon in the oven is one of the easiest and most reliable ways to get perfectly crispy, evenly cooked slices without the usual stovetop mess. Whether you’re preparing breakfast for yourself or feeding a crowd, oven-baked bacon simplifies the process while delivering consistent results.
Instead of dealing with grease splatters and constant flipping, this method lets the oven do all the work. Once you try it, it’s hard to go back.
Why Oven-Baked Bacon Is Better
Oven baking has become a favorite method among home cooks and professional chefs alike, and for good reason.
- Even cooking: The oven distributes heat evenly around each slice, preventing burnt edges and undercooked centers
- Less mess: No grease splattering across your stovetop or counters
- No flipping required: Bacon cooks evenly without needing to be turned
- Great for large batches: You can cook an entire pack or more at once
- Hands-free cooking: While the bacon bakes, you can prepare other dishes
For anyone who values convenience and consistency, cooking bacon in the oven is a game-changer.
What You’ll Need
Before you begin, gather a few basic kitchen tools:
- Bacon slices (regular, thick-cut, or turkey bacon)
- A rimmed baking sheet to contain grease
- Parchment paper or aluminum foil for easy cleanup
- Tongs or a fork for handling hot bacon
- Paper towels to absorb excess grease
Optional: A fine-mesh strainer and heatproof jar if you want to save the rendered bacon fat.
Step-by-Step Guide to Cooking Bacon in the Oven
1. Preheat the Oven
Set your oven to 400°F (204°C). This temperature works well for most types of bacon, producing a crisp texture without burning.
If you’re using thinner slices, you can lower the temperature slightly to 375°F, but 400°F is ideal for maximum crispiness.
2. Prepare the Baking Sheet
Line your baking sheet with parchment paper or foil. This step prevents sticking and makes cleanup much easier. Make sure the sheet has raised edges to catch the bacon fat.
3. Arrange the Bacon
Lay the bacon slices in a single layer across the sheet. They can be placed close together, but avoid overlapping, as this will cause uneven cooking and steaming instead of crisping.
If you’re cooking a large batch, use multiple trays instead of overcrowding one.
4. Bake the Bacon
Place the tray on the middle rack of your oven and bake for 10 to 20 minutes, depending on the thickness of the bacon.
- Thin slices: 10–15 minutes
- Thick-cut bacon: 15–20 minutes
Start checking around the 10-minute mark. The bacon is ready when it turns deep golden brown and looks crispy.
5. Drain and Serve
Remove the bacon from the oven and transfer it to a plate lined with paper towels. Let it sit for a minute or two to crisp up further before serving.
Oven Temperature and Timing Guide
- Regular bacon: 400°F (204°C), 10–15 minutes
- Thick-cut bacon: 400°F (204°C), 15–20 minutes
- Turkey bacon: 375°F (190°C), 8–12 minutes
Keep in mind that oven performance can vary, so always rely on visual cues rather than time alone.
Expert Tips for Perfect Oven-Baked Bacon
Getting consistently great results comes down to a few simple techniques:
- Check early: Ovens can run hotter than expected, so monitor the bacon after 10 minutes
- Use uniform slices: Even thickness ensures consistent cooking
- Avoid overlapping: Overlapping traps moisture and prevents crisping
- Choose sturdy pans: Heavy-duty baking sheets distribute heat more evenly
- Skip flipping: The oven cooks both sides evenly, so flipping isn’t necessary
- Rotate trays if needed: If using multiple racks, rotate halfway through for even cooking
For extra crispy bacon, you can place the slices on a wire rack set over the baking sheet. This allows fat to drip away as the bacon cooks.
Easy Cleanup and Saving Bacon Fat
One of the biggest advantages of cooking bacon in the oven is how easy cleanup becomes.
- Parchment paper: Simply discard after use
- Foil lining: Fold and throw away once cooled
- Minimal scrubbing: The grease stays contained on the tray
If you want to save bacon fat, let it cool slightly, then strain it into a heatproof jar using a fine-mesh strainer. Store it in the refrigerator and use it to add flavor to eggs, vegetables, or even roasted potatoes.
How to Store and Reheat Bacon
Storage
Let leftover bacon cool completely, then store it in an airtight container with paper towels between layers. It will stay fresh in the refrigerator for up to 5 days.
Freezing
To freeze, place slices between sheets of parchment paper and store in a freezer-safe bag. Use within 2 months for best quality.
Reheating
- Oven: Heat at 350°F for 5–7 minutes
- Skillet: Warm over medium heat until crisp
Avoid microwaving if you want to maintain crispiness.
Delicious Ways to Use Oven-Baked Bacon
Crispy bacon isn’t just for breakfast—it’s a versatile ingredient that can enhance many dishes.
- Serve alongside eggs, toast, pancakes, or waffles
- Crumble over salads, soups, or baked potatoes
- Add to sandwiches like BLTs, burgers, or wraps
- Mix into scrambled eggs, omelets, or breakfast casseroles
- Use as a topping for mac and cheese, pizza, or roasted vegetables
Its smoky, salty flavor pairs well with both savory and even slightly sweet dishes.
Common Mistakes and How to Fix Them
Even though oven-baked bacon is simple, a few common mistakes can affect the results.
- Bacon turns out chewy: Bake it longer and ensure slices aren’t overlapping
- Bacon burns: Lower the temperature slightly and check earlier
- Too much grease: Use a wire rack to elevate the bacon
- Bacon sticks to the pan: Always line your tray and remove bacon while still warm
Paying attention to these small details can make a big difference in the final texture.
Why This Method Works So Well
The oven surrounds the bacon with consistent heat, allowing it to cook evenly from all sides. As the fat renders slowly, the bacon crisps up without burning or curling excessively.
This controlled environment is what makes oven-baked bacon more reliable than stovetop methods, especially when cooking larger quantities.
Cooking bacon in the oven is simple, clean, and consistently effective. With just a few basic steps, you can achieve perfectly crispy bacon every time—no splatter, no stress, and no guesswork.
FAQs
How long to cook bacon in the oven at 400°F?
Thick-cut takes 18–25 minutes; thin-cut takes 12–18 minutes. Check for golden edges.
Do you need to flip bacon when baking?
No—oven heat crisps both sides evenly without touching.
Can you reuse bacon fat from the oven?
Yes, strain and store in a jar; great for frying or flavoring veggies.
Why line the pan for oven bacon?
Catches drippings, prevents sticking, and makes cleanup a breeze.
Is oven-baked bacon healthier?
It renders more fat naturally, so strips end up less greasy than pan-fried.