Caramelized Onions Recipe
Caramelized Onions Recipe
Caramelized onions are one of the easiest ways to transform simple dishes into something complex and restaurant-worthy. Slowly cooking onions draws out their natural sugars and concentrates both sweetness and savory depth, turning sharp, pungent slices into soft, jammy strands of flavor.
They’re the secret behind rich French onion soup, amazing burgers and sandwiches, savory tarts, dips, pizzas, and more—and once you learn the right technique, you can make a big batch and use them all week.
Caramelization vs Maillard Browning: What’s Really Happening?
Two main processes turn raw onions into that glossy, brown, flavor-packed tangle:
- Caramelization
- Driven mostly by sugars in the onion.
- Produces deep sweetness, golden to amber color, and a mellow flavor.
- Maillard reaction
- A reaction between amino acids and sugars at higher temperatures.
- Adds savory, toasty, umami notes and deepens the brown color.
Onions naturally contain sugars like fructose and glucose, along with small amounts of protein. As they cook slowly, water evaporates, sugars concentrate and break down, and both caramelization and Maillard reactions build layers of flavor. This is why long, gentle cooking leads to richer, more complex onions than quick high-heat browning.
Choosing and Prepping Onions for Caramelizing
Best Onion Types
You can technically caramelize any onion, but some give better results than others:
- Yellow onions: The most reliable choice—balanced sweetness and savoriness, excellent for deep, long cooking.
- White onions: Milder, with a cleaner flavor; they caramelize reasonably well but may taste less robust than yellow.
- Red onions: Slightly sweeter and fruitier; they lose most of their color and won’t usually get as dark, but still work if that’s what you have.
- Sweet onions (like Vidalia): Very high in sugar, so they become sweet quickly but sometimes lack the intense savory depth of yellow onions.
If you’re unsure, start with yellow onions—they’re dependable and inexpensive.
How to Slice Onions for Caramelizing
After peeling and trimming the root and stem ends:
- Slice onions from root to stem (top to bottom) into about ¼‑inch (6 mm) thick slices for soft, jammy results.
- Vertical (root-to-stem) slices tend to hold their shape and cook evenly, which is ideal for spreading over burgers, mixing into dips, or using in soups.
- Half-moon slices (across the bulb) give a bit more texture if you prefer a less “jammy” onion.
Step-by-Step: How to Caramelize Onions Properly
Real caramelized onions take time, low to medium heat, and patience. Plan on 45–60 minutes for best flavor.
Ingredients (Large Batch)
- 8–10 large yellow onions (or as many as will comfortably fit in your largest pan)
- 3 tablespoons butter
- 3 tablespoons olive oil (or another neutral oil)
- 1–2 teaspoons kosher salt (to taste)
- Optional: a small pinch of sugar, plus a little water for deglazing as needed
Equipment
- Wide, heavy-bottomed skillet or Dutch oven (stainless steel or cast iron recommended)
- Wooden spoon or heat-safe spatula
Step 1: Prep the Onions
- Cut off the root and stem ends.
- Peel the onions.
- Halve each onion from root to stem.
- Lay flat side down and slice into ¼‑inch slices along the root-to-stem direction.
You’ll have a big pile—these will cook down dramatically.
Step 2: Heat the Fat
- Place your skillet on medium heat.
- Add 3 tablespoons butter and 3 tablespoons olive oil.
- Once the butter melts and the mixture is shimmering, you’re ready to add onions.
Using both butter and oil gives rich flavor while the oil raises the smoke point, helping prevent scorching.
Step 3: Add Onions and Season
- Add all sliced onions to the pan.
- Sprinkle with salt (this helps draw out moisture).
- Optional: add a very small pinch of sugar if your onions are not particularly sweet.
Toss to coat the onions evenly in the fat.
Step 4: Start the Slow Cook
- Reduce the heat to medium-low.
- Cook the onions, stirring every few minutes.
At first, they will:
- Soften and turn translucent
- Release moisture and shrink significantly
If you hear aggressive sizzling or see browning too quickly, lower the heat. You’re aiming for gentle cooking, not a fast sear.
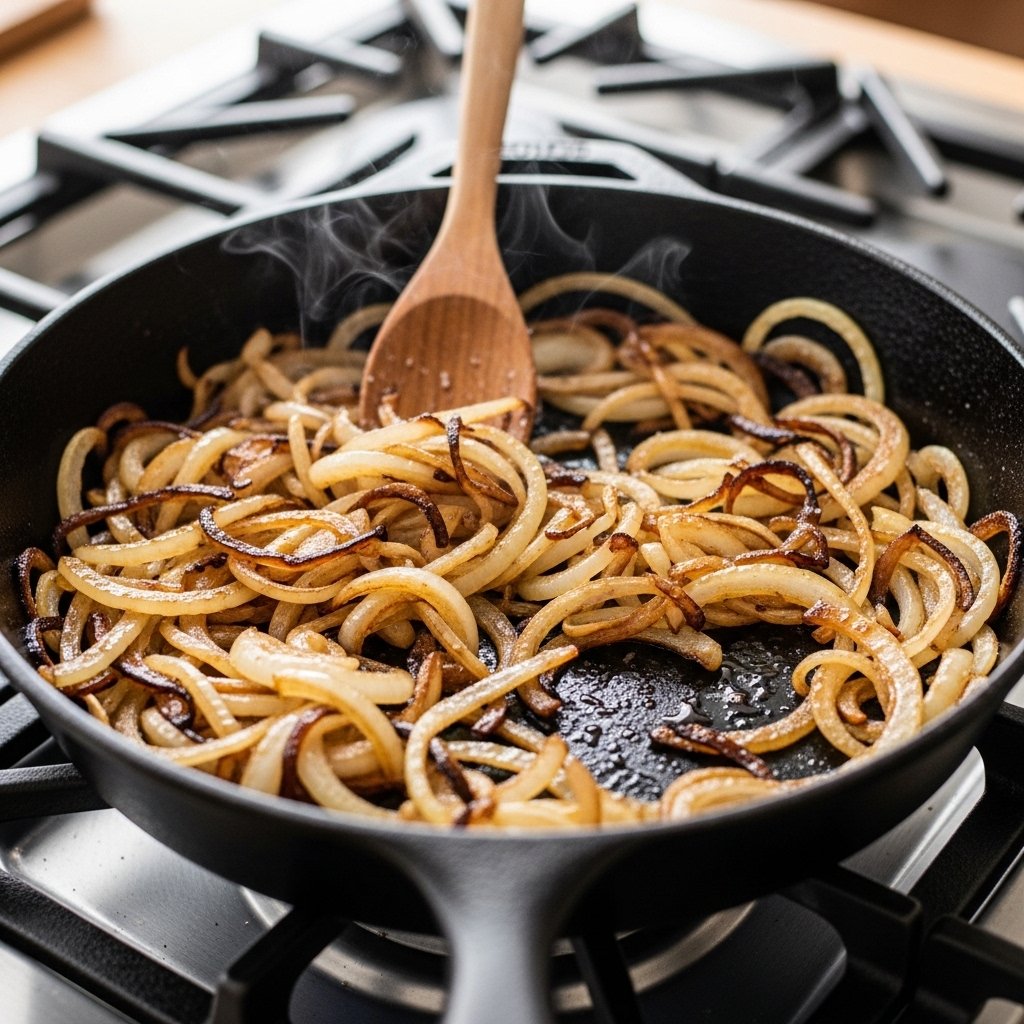
Step 5: Manage Sticking and Browning
Over time, fond (brown bits) may form on the pan:
- If onions start to stick or look like they might scorch, splash in a tablespoon or two of water.
- Stir and scrape up the browned bits—they’re packed with flavor.
- Let the water cook off and continue.
You can repeat this light deglazing as needed; it prevents burning and builds flavor without rushing the process.
Step 6: Watch the Color Timeline
Here’s what you can expect over roughly 45–60 minutes:
- 15 minutes:
- Onions: soft, translucent, pale yellow.
- Flavor: mild, only slightly sweet, some “raw” sharpness remains.
- 30 minutes:
- Onions: light golden, very soft, more moisture evaporated.
- Flavor: noticeably sweeter, less pungent.
- 45 minutes:
- Onions: deeper golden brown, significantly reduced volume, some strands starting to look sticky/jammy.
- Flavor: rich, sweet, and complex.
- 60 minutes:
- Onions: deep mahogany brown, glossy, jam-like in texture.
- Flavor: intensely sweet, savory, and almost “meaty.”
Three or four large onions can reduce to less than a cup of finished caramelized onions—this is normal and a sign that water has cooked off and flavors are concentrated.
Step 7: Optional Deglazing for Extra Depth
Once the onions are fully caramelized, you can deglaze the pan for another layer of flavor:
- Add a splash of water, stock, wine, or balsamic vinegar.
- Stir to dissolve any remaining browned bits from the pan.
- Cook for another minute or two until mostly absorbed.
This creates a glossy coating and pulls every bit of flavor into the onions.
Expert Tips & Common “Speed-Up” Myths
Best Practices
- Use a wide pan: More surface area = better evaporation and more even browning.
- Stir regularly, not constantly: Stir every few minutes. Too much stirring slows browning; too little risks burning.
- Control heat carefully: Medium-low is usually ideal; adjust down if you see dark spots forming quickly.
- Don’t walk away too long: The line between perfect and burnt can be thin near the end, so stay attentive.
About “Quick” Caramelizing Hacks
You’ll see claims that you can caramelize onions in 10–20 minutes using tricks like extra sugar, high heat, or baking soda. These methods can brown onions faster, but they don’t always produce the same deep, rounded flavor and texture as slow caramelization:
- High heat:
- Pros: Faster browning.
- Cons: More risk of burning, harsh or bitter flavors, uneven texture.
- Extra sugar:
- Pros: Darker color and sweeter taste sooner.
- Cons: Can burn on the pan, create sticky residue, and doesn’t replace the flavor complexity from slow cooking.
- Baking soda:
- Pros: Speeds browning by changing pH.
- Cons: Can make onions mushy and leave an odd aftertaste if overused.
For true, jammy caramelized onions, there’s really no substitute for 45–60 minutes of gentle cooking.
Making Caramelized Onions in Larger Batches
Because caramelizing onions takes time, it makes sense to cook a big batch:
- Use your largest wide pan or a Dutch oven.
- Fill with sliced onions up to a comfortable level (they’ll shrink a lot).
- Follow the same method, but expect the early stages to take a bit longer due to the extra moisture.
Once done, portion into small containers so you can pull out just what you need later.
How to Use Caramelized Onions
Caramelized onions are incredibly versatile:
- Soups & stews: Essential for French onion soup; great for enriching beef or vegetable stews.
- Pizzas & flatbreads: Spread over the base with cheese, mushrooms, or sausage.
- Burgers & sandwiches: Add to grilled cheese, burgers, panini, or roast beef sandwiches.
- Egg dishes: Stir into frittatas, quiches, omelets, or scrambled eggs.
- Grain and pasta bowls: Mix into risottos, pastas, or grain bowls for extra depth.
- Dips and spreads: Combine with sour cream, yogurt, or cream cheese for a savory onion dip.
Storing and Freezing Caramelized Onions
Refrigeration
- Cool completely.
- Store in an airtight container in the fridge for up to 1 week.
- Reheat gently in a skillet or the microwave.
Freezing
- Portion into small containers or freezer bags (you can freeze in ice cube trays for small amounts).
- Freeze for 2–3 months.
- Reheat directly from frozen in a pan, or let thaw in the fridge.
Having caramelized onions on hand makes it easy to upgrade everyday meals without having to start from scratch each time.
FAQs
How long to caramelize onions?
It takes 45 to 60 minutes on low heat to caramelize 2 pounds of onions. Stir often to get an even golden color.
Low or high heat for caramelizing onions?
Start with medium heat, then lower it. High heat will burn the sugars before they can develop flavor.
Can you caramelize onions in advance?
Yes, you can keep caramelized onions in the fridge for up to a week or freeze them in portions for several months.
Why add baking soda to caramelize onions?
Speeds sugar breakdown, cutting time without significantly affecting flavor.
Water method for faster caramelized onions?
Steam first with 1/2 cup water to soften quickly, then brown normally.