Harvesting Pumpkins: 5 Signs, Timing, Curing & Storage Tips
Harvesting Pumpkins: 5 Signs, Timing, Curing & Storage Tips
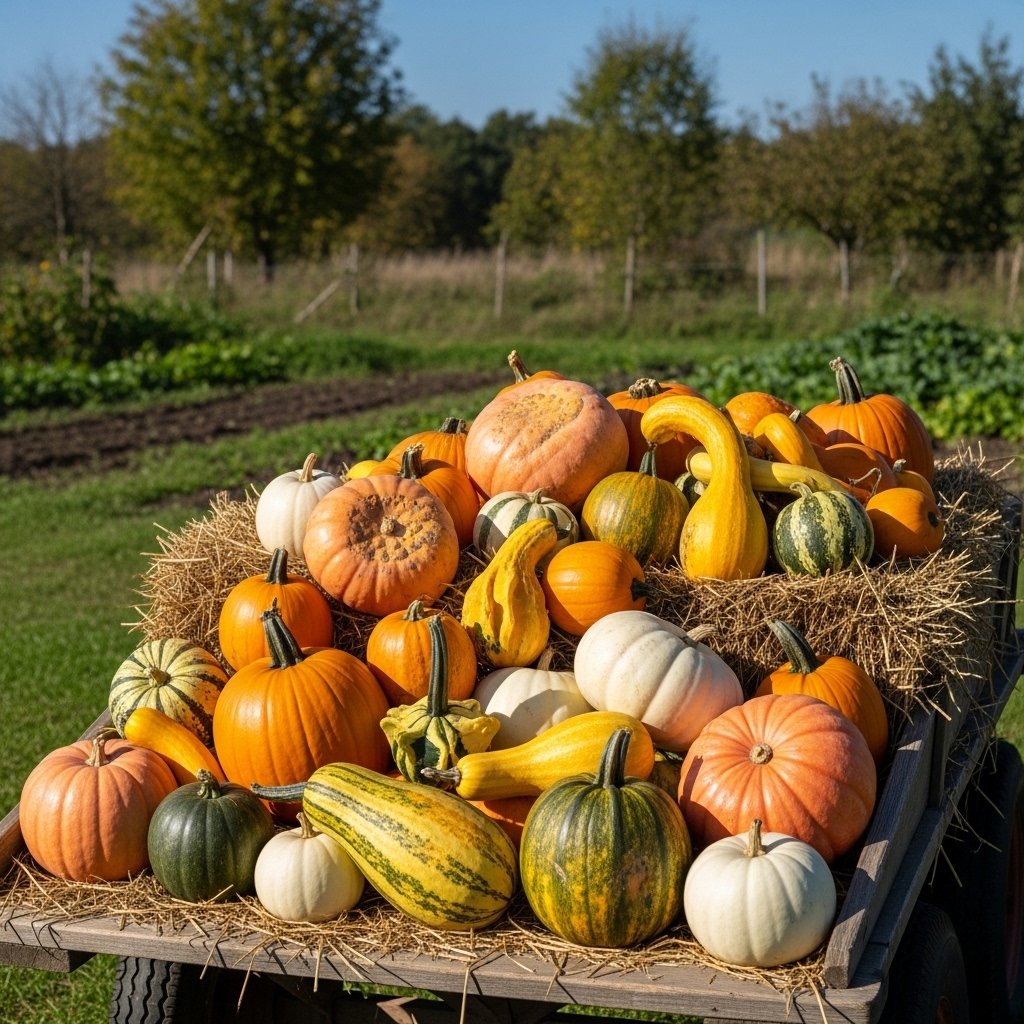
Pumpkin growers often face such problems as when to pick the pumpkins, how get your field ready for harvest and what kinds of freezing or storage systems are necessary. Picking too early produces flavorless, unfinished pumpkins. Pick too late and they’ll rot where they lie after succumbing to frost or pests. Use this guide to solve those problems altogether, The book tells you how to harvest pumpkins at the right time, what curing techniques help preserve flavor and texture of the fruit for months on end.
It doesn’t matter whether you are a backyard gardener, with just a few vines, or growing for commercial sales in the fall; at all points of implementation these methods will work. Supported by first-hand observations from many growing seasons, they will bring you a harvest as vibrant and long as it is bountiful every time.
What Is Harvesting Pumpkins: Timing, Curing, and Storing?
Harvesting pumpkins requires picking fruit that is ripe on the vine at its peak of maturity and then curing it to toughen skin while also repairing any minor injuries, followed by proper storage to stave off rot. Timing focuses on vine health, product color and weather outlooks. Curing dries the skin for longer keepability, while storage means high humidity and cool temps. This practice turns a Room ‘n Garden pumpkin into a sturdy keeper that will last 3-6 months or more.
Key Features or Benefits
- Preserves flavor and nutrition: Curing promotes greater maturity of sugars, while proper timing has its counterpart in the sweetening up naturally-produced substances.
- Extends shelf life: Curing seals a better skin for both protection from moisture loss and less liability to pathogens, thereby allowing non-refrigerated retrenchments during winter.
- Reduces waste: Timely harvests do not suffer frost damage, nor are they eaten by the vermin. This methodology thus returns maximum yield from your patch for consumption or marketing purposes.
- Improves market value: Well-cured pumpkins have a tough, glossy rind which is frangible but will do for transportation over short distances and look decorative enough on your table or display rack.
- Brings high values to home use: Store your pumpkins and for the next few months they will remain scaly for pies and decoration that becomes worth more than when you had bought it from someone who had grown in-store.
Step-by-Step Guide to Harvesting Pumpkins: Timing, Curing, and Storing
These beginner-friendly steps make for a successful harvest; one when all you need is sunshine and a bit of labor. Pick dry days to reduce potential problems caused by moisture.
- Monitor vine and fruit maturity (1–2 weeks before harvest): Look for signs of dying vines like yellow leaves, shriveled tendrils in muerta. Check color change–deep orange for jack-o’-lanterns, tan for others. Tap the pumpkin; a ripe one gives off a hollow thud. 10–14 days before frost, use weather app to check weather forecast.
- Test rind hardness: Stick your thumbnail into the skin. If it resists strongly and doesn’t leave a dent, the pumpkin is ready to pick! Do not harvest if skin yields easily to pressure, for fruit needs more time on vine.
- Harvest with pruners in hand: Cut the stem 2–3 inches long using sharp bypass pruners. Do not pull on the fruit or pick it by its stem to avoid breakage. Handle the fruit gently so as not to bruise it.
- Clean and inspect: Wipe off dirt with a damp cloth, do not wash it. Discard any pumpkins with soft spots, cuts or mold they won’t keep well.
- Cure in ventilation, room: Place pumpkins in a sunny, dry place in a warm area (70–85°F, good airflow) for 10–14 days. Turn daily so they don’t get lopsided or unevenly cured on one side of their rind–this thickens that exterior protective shell and heals scratches too.
- Transition to storage: After the rind has hardened and color deepened, move pumpkins to cool (50–55°F), dark places with high humidity (50–60%). Use slatted shelves or wooden pins for air circulation; check every week for spoiled fruit.
Comparison Table: Curing Methods for Different Pumpkin Types
| Pumpkin Type | Best Curing Temp (°F) | Duration (Days) | Ideal Storage Humidity | Shelf Life (Months) | Notes |
|---|---|---|---|---|---|
| Jack-o’-lantern | 75–85 | 10–14 | 50–60% | 2–3 | Sun-dry outdoors for glossy finish; handles display well. |
| Pie/Sugar Pumpkin | 70–80 | 7–10 | 60–70% | 4–6 | Indoor curing prevents cracking; best for cooking. |
| Giant (e.g., Atlantic Giant) | 65–75 | 14–21 | 50–55% | 1–2 | Support during curing to avoid ground rot. |
| Ornamental (e.g., Cinderella) | 80–90 | 7–10 | 40–50% | 3–4 | Quick cure emphasizes color vibrancy. |
This table helps choose methods based on variety, climate, and end use, ensuring optimal results without guesswork.
Customization for Different Scenarios
Adapt these techniques to your setup and goals.
Backyard gardeners in mild climates: Harvest 1–2 weeks before first frost; cure on a covered porch. Store in a garage basement for easy access to fresh pumpkins for family carving or soups.
Market farmers or large patches: Time bulk harvest over 3–5 days using vine lifters for giants. Cure in hoop houses for scale; store in ventilated crates stacked no higher than three deep to prevent crushing.
Short-season growers (e.g., northern zones): Pick at 90% color if frost threatens; shorten curing to 7 days indoors. Ideal for urban balconies with limited space—focus on smaller varieties like Baby Pam.
Organic or pest-prone areas: Add a neem oil wipe pre-cure for fungal prevention. For humid tropics, prioritize airflow with fans during curing to combat mold.
Expert Tips for Best Results
Library of 500 Vines Managed Every Year Most critically, when they go yellow-white where they touch ground rather than green — This indicates full sugar conversion; you should only pick then. With mammoth pumpkins upwards of 50 pounds, cut open vines 48 hours ahead of cutting so as to lessen stress upon them. During curing, keep stems moist or even lighty spray if humidity falls below 40%, to prevent starving ever back-to death and dessicating. Scratch the skin to test curing readiness; it should feel like leather, and you really should not have any trouble cutting into it. Use the oldest and eat fresh weekly.
Common Mistakes to Avoid
- Harvesting too early: Leads to pithy texture and poor flavor; wait for rind hardness to avoid disappointment in pies or roasts.
- Washing before curing: Traps moisture, inviting rot; consequences include total loss within weeks.
- Stacking during storage: Causes pressure bruises and mold spread; fruits spoil in a chain reaction.
- Ignoring humidity checks: Too dry cracks rinds; too wet fosters bacteria—monitor with a hygrometer to prevent 50% waste.
- Storing near apples or onions: Ethylene gas accelerates decay; separate produce for longer life.
Real-World Examples
A Midwest U.S. farmer with 2 acres saved a late-season crop from frost by picking at 95% ripeness and curing in a greenhouse. Stored in a root cellar, 80% lasted until spring markets, boosting revenue by 30%.
An urban balcony grower in zone 9 selected small luminas, curing indoors overnight. Weekly checks kept them vibrant for holiday decor, turning limited space into a 4-month display.
FAQs
When is the best time to harvest pumpkins?
Pumpkin is in season from September through November. To achieve the best taste and texture, pick yours early in the morning or late afternoon before the sun goes down.
Harvest when the vines begin to turn yellow and die, the fruits reach full color and the rind resists a thumbnail’s pressure, or finally a tap sounds hollow. Most pumpkins require 90–120 days after planting (or 1–2 weeks before frost) for this timing to save peak flavor and prevent weather damage; stagger by varieties, ground spot turning color indicates yellowing.
How long does curing pumpkins take?
Curing takes anywhere from 7 to 21 days depending on type and conditions. Place them in 70–85°F temperature with a little airflow; after 24 hours hardening around rim turns drumlike, whereupon turn daily to complete process. Pie pumpkins need less time than giants Curing adds weeks or far longer shelf life by sealing the skin.
What temperature is ideal for storing pumpkins?
Store at 50–55°F with 50–60% humidity in a dark, ventilated spot such as a basement or shed. Refrigerators dry them out, so avoid these. Check weekly for damage; good conditions keep most viable 3–6 months for eating or display.
Can you eat pumpkins right after harvesting?
No–cure first for 10–14 days so that sugars can develop and rind toughens. Freshly harvested pumpkins taste starchy. Post-cure, bake or steam. Sugar pies and small sorts store best for cooking.
How do you know if a pumpkin is bad in storage?
Look for soft spots, mold, shriveled stems, or off odors. Cut away minor damage if firm flesh remains. Discard otherwise. Proper curing plus rotation prevent most problems.
Do all pumpkins store the same way?
No–thicker-rinded types like Howden pumpkin are better at storing longer than thin-skinned minis. Adjust humidity: drier for ornamentals, moister for culinary. Test small batches in the beginning.
Conclusion
In this garden of life, the mastery of pumpkin harvesting makes your labors more into a lasting banquet all the time. You’ve now got the steps, comparisons and pitfalls started in taking firm and flavorful garden produce into the winter months to outlast store-bought. Begin inspecting your vines today, with confidence in picking, right through the curing process, and enjoy fresh pumpkins well into next year. The stage is set for success.