Hershey’s Old Fashioned Rich Cocoa Fudge Recipe
Hershey’s Old Fashioned Rich Cocoa Fudge Recipe
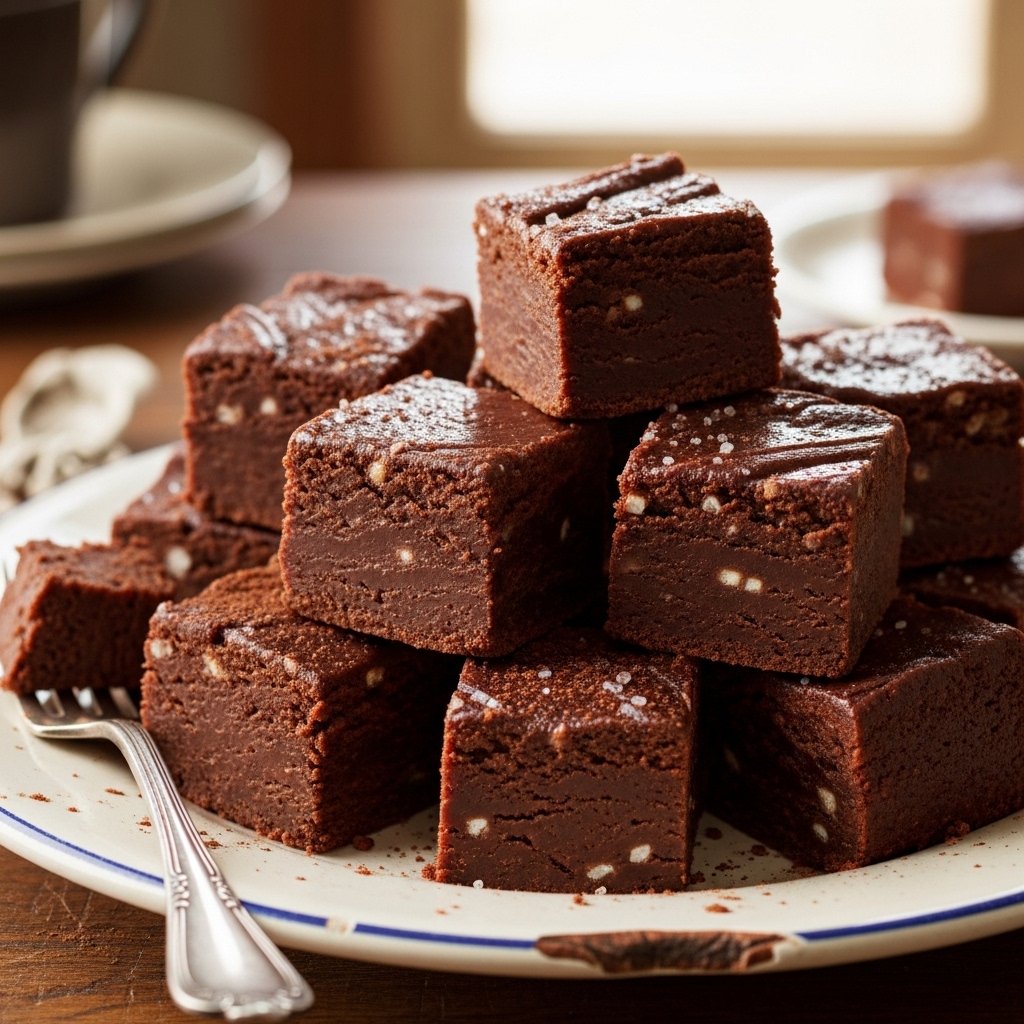
Hershey’s Old-Fashioned Rich Cocoa Fudge is one of those recipes that feels as nostalgic as it is delicious—firm yet creamy, deeply chocolatey, and unmistakably homemade. Unlike shortcut fudges that rely on chocolate chips and sweetened condensed milk, this classic version builds its flavor and texture from simple pantry ingredients and careful technique.
Below is a fully rewritten, clearly structured, and grammar-polished guide to making this old-fashioned cocoa fudge, along with tips, variations, and troubleshooting advice.
What Makes This Fudge Special
This style of fudge is all about tradition. It uses basic ingredients—sugar, cocoa, milk, butter, and vanilla—to create a dense, smooth candy with a clean chocolate flavor and a satisfying bite. When done correctly, it slices neatly, holds its shape, and can be stacked, packed, or gifted without becoming sticky or gooey.
It’s more technique-driven than modern “cheater” fudges, but that’s exactly why it tastes so uniquely rich and old-fashioned.
Recipe Overview
- Prep Time: About 20 minutes
- Cook Time: About 40 minutes (plus cooling and beating time)
- Yield: About 10 servings (depending on square size)
Ingredients
Gather these core ingredients before you begin:
- 3 cups granulated sugar
- ⅔ cup unsweetened cocoa powder (Hershey’s is traditional)
- ⅛ teaspoon salt
- 1½ cups milk
- ¼ cup butter (½ stick), melted
- 1 teaspoon vanilla extract
- 1 cup black walnuts, chopped (optional, or substitute other nuts)
With just these staples, you get a fudge that’s intensely chocolatey and wonderfully classic.
Essential Equipment
Having the right tools makes a big difference with candy recipes:
- Large heavy-bottomed saucepan: Helps prevent scorching and ensures even heating.
- Wooden spoon: Traditional for fudge; it doesn’t get too hot and can help minimize unwanted crystallization.
- Candy thermometer (highly recommended): For accurate temperature control.
- 8- or 9-inch square pan: Lined with foil and buttered, or use a generously buttered heatproof plate.
Step-by-Step: How to Make Old-Fashioned Cocoa Fudge
1. Prepare the Pan
- Line an 8- or 9-inch square pan with aluminum foil, letting it hang over the edges to create handles.
- Butter the foil generously, or, if you prefer, butter a large heatproof plate as an alternative.
Preparing the pan in advance is important because the fudge sets quickly once it’s ready.
2. Combine Dry Ingredients
- In a heavy saucepan, add the sugar, cocoa powder, and salt.
- Stir thoroughly to break up any cocoa lumps and make sure everything is evenly mixed.
Even distribution at this stage helps ensure a smooth, uniform fudge.
3. Add the Milk
- Gradually pour in the milk while stirring with a wooden spoon.
- Stir until the mixture is fully combined and no dry spots remain.
The wooden spoon is more than just nostalgic—its sturdiness and low heat conductivity make it ideal for candy making.
4. Cook and Stir to a Full Boil
- Place the saucepan over medium heat.
- Stir constantly as the mixture heats up, making sure to scrape the bottom and sides to prevent scorching.
- Continue stirring until the mixture reaches a full rolling boil, meaning the bubbling doesn’t stop when stirred.
At this stage, all the sugar should be dissolved and the mixture smooth and uniform.
5. Boil Without Stirring
This is the part where patience and precision matter most.
- Once the mixture reaches a full rolling boil, stop stirring.
- Attach your candy thermometer (if using), making sure the tip is submerged but not touching the bottom of the pan.
- Allow the mixture to boil undisturbed until it reaches about 234°F—the soft-ball stage.
If you don’t have a thermometer, you can use the cold water test:
- Drop a small spoonful of the hot mixture into very cold water.
- If it forms a soft ball that holds its shape when lifted from the water but can still be gently flattened with your fingers, it’s at soft-ball stage.
Resist the urge to stir while it boils; stirring during this phase can cause sugar crystals to form and make the finished fudge grainy.
6. Add Butter and Vanilla (But Don’t Stir Yet)
- As soon as the fudge reaches soft-ball stage, remove the pan from the heat.
- Immediately add the melted butter and the vanilla extract over the surface of the mixture.
- Do not stir.
Allowing the mixture to cool undisturbed helps control crystallization and leads to a smoother texture later.
7. Let the Fudge Cool Undisturbed
- Leave the pan at room temperature and let the mixture cool completely without touching it.
- This can take up to 2 hours or more.
You’ll notice a slight skin forming on top and the mixture becoming thicker as it cools—this is exactly what you want before you begin beating.
Beating, Shaping, and Cutting
8. Beat the Fudge
Once the mixture is fully cooled to lukewarm:
- Add the black walnuts (or other nuts), if using.
- Using a wooden spoon, beat the fudge vigorously.
You’re looking for two key signs:
- It starts to thicken noticeably.
- It loses its glossy shine and looks more matte.
This beating stage can take 10–20 minutes, depending on temperature and batch size. It’s a workout, but it’s essential for achieving the classic firm-yet-creamy texture.
9. Spread into the Pan
- As soon as the fudge thickens and becomes less glossy, quickly pour or scrape it into your prepared pan or buttered plate.
- Use a spatula or the back of the spoon to smooth it out—work quickly, as it will start to set almost immediately.
10. Cool Completely and Cut
- Allow the fudge to cool until it is completely set.
- Once firm, lift it out of the pan using the foil overhang or slide it from the plate.
- Use a sharp knife, warmed by dipping in hot water and drying, to cut into neat squares.
- Wipe and re-warm the knife as needed for clean cuts.
Storage and Serving
- Room temperature: Store fudge loosely wrapped in foil or in an airtight tin at room temperature. In most climates, it doesn’t require refrigeration.
- Refrigeration: In very warm or humid environments, chill to maintain firmness, then bring to room temperature before serving for the best texture.
Serve the squares on dessert trays, pack them in paper cups or candy boxes for gifts, or enjoy them straight from the tin.
Tips and Troubleshooting
Key Tips for Success
- Use a heavy pan: Thin pans can lead to hot spots and scorching. A heavy-bottomed saucepan helps heat evenly.
- Avoid stirring after it boils: Stir only until the mixture reaches a rolling boil; then stop to prevent graininess.
- Check your thermometer: Make sure your candy thermometer is accurate—test it by seeing if it registers 212°F in boiling water.
- Don’t rush cooling: Let the fudge cool undisturbed before beating. This step affects both structure and texture.
- Beat long enough: Stop beating only when the mixture has thickened and lost its sheen. If it’s still glossy, it may set too soft or sticky.
Common Problems and Fixes
- Fudge didn’t set (too soft or runny):
- It may not have reached soft-ball stage.
- Check thermometer accuracy and ensure you boiled long enough.
- Don’t attempt to fix by adding ingredients after it has cooled; instead, note the issue for next time.
- Grainy texture:
- Often caused by stirring once the mixture has begun to boil or sugar crystals forming on the side of the pan.
- Make sure to stop stirring at the rolling boil and avoid scraping sugar crystals from the sides into the mixture.
- Sticky fudge:
- Usually a sign of undercooking or not beating long enough.
- Ensure you reach soft-ball stage and beat until the gloss fades.
- Too dry or crumbly:
- This points to overcooking past soft-ball stage, removing too much moisture.
- Next time, remove from heat as soon as the thermometer reads around 234°F and cool as directed.
Texture, Tradition, and Flavor
This old-fashioned fudge is firmer and more sliceable than many modern versions, yet it still melts pleasantly in your mouth. It holds its shape at room temperature, stacks neatly, and is ideal for gifting, cookie trays, and holiday tins.
For many families, this Hershey’s-style fudge is more than just candy—it’s tradition: a recipe seen on the back of cocoa tins, passed through generations, and made for holidays, birthdays, and special gatherings. The deep, pure cocoa flavor and classic “fudge shop” texture are hard to replicate with shortcut methods.
Variations and Custom Touches
You can personalize this classic recipe without losing its old-fashioned charm:
- Nuts:
- Black walnuts add bold, distinctive flavor.
- Regular walnuts, pecans, or almonds give a milder, more familiar crunch.
- Special dark cocoa:
- Substitute some or all of the regular cocoa with a darker cocoa for a deeper, more bittersweet chocolate note.
- Marshmallow additions:
- Stir in marshmallow creme or mini marshmallows for a softer, smoother, more modern-style fudge. This will slightly change the traditional texture.
- Flavor accents:
- Add a bit of instant coffee or espresso powder to deepen chocolate flavor.
- Incorporate a pinch of chili powder or cinnamon for a subtle, warming twist.
- Fold in orange or other citrus zest for a bright, aromatic variation.
Serving, Storing, and Gifting
Gifting: Pack pieces in small boxes or tins lined with wax or parchment paper. The firm texture means it travels well and is ideal for mailing during the holidays.
Serving: Arrange squares on a dessert plate, tiered stand, or holiday platter.
Storing: Keep in a cool, dry place in a covered tin or container. Properly cooked fudge won’t easily melt or collapse.
FAQs
How long does Hershey’s Old Fashioned Rich Cocoa Fudge take to set?
Let the fudge cool to room temperature for 2 hours, or refrigerate overnight for cleaner cuts.
Can I use regular milk instead of evaporated?
Evaporated milk helps prevent separation, whereas regular milk can curdle. It’s best to use canned evaporated milk.
Why is my fudge grainy?
If you stir too much after boiling or if sugar crystals form, the fudge can turn grainy. Next time, beat it smoothly.
Does Hershey’s Cocoa Fudge need a candy thermometer?
No—soft ball test works. The thermometer confirms 234°F for precision.
Can I double the recipe?
Yes, you can double the recipe. Just use a larger pan and cook for the same amount of time. Do not overcrowd the saucepan.