Perfect Buttercream Frosting Recipe
Perfect Buttercream Frosting Recipe
Buttercream frosting is a baker’s best friend: simple to make, easy to customize, and reliably smooth and creamy. Once you master a basic buttercream, you can adapt it for almost any cake, cupcake, cookie, or bar.
Here’s a fully rewritten, polished version of your guide with clear structure and refined wording.
Why Buttercream Frosting Is a Go-To
Buttercream is popular with home bakers and professionals alike because it’s:
- Made from just a handful of pantry ingredients.
- Fluffy, smooth, and easy to spread or pipe.
- Suitable for decorating everything from simple sheet cakes to intricate layer cakes.
- Highly customizable with flavors, colors, and textures.
- Fast to prepare—usually ready in under 10 minutes.
With one reliable base recipe, you can create countless variations for birthdays, holidays, weddings, and everyday treats.
Core Ingredients for Classic Buttercream
Here’s the basic formula for a standard batch of vanilla buttercream:
| Ingredient | Amount | Purpose |
|---|---|---|
| Unsalted butter (softened) | 1 cup (2 sticks) | Provides rich flavor and creamy structure |
| Powdered sugar | 3–4 cups | Sweetens, thickens, and creates a smooth texture |
| Vanilla extract | 1–2 teaspoons | Adds classic warmth and aroma |
| Milk or heavy cream | 2–3 tablespoons | Adjusts consistency for spreading or piping |
| Salt (optional) | Pinch | Balances sweetness and rounds out flavor |
Ingredient Notes
- Unsalted butter: Gives you control over salt levels. If you use salted butter, omit the extra salt.
- Softened butter: Butter should be pliable and slightly cool—not melted. This is crucial for smooth, lump-free frosting.
- Pure vanilla extract: Offers better flavor than artificial vanilla.
- Milk vs. cream: Milk produces a lighter frosting; heavy cream yields a richer, fluffier texture.
Step-by-Step: How to Make Basic Buttercream
1. Cream the Butter
- Place softened butter in a large mixing bowl.
- Using a hand mixer or stand mixer fitted with the paddle attachment, beat on medium speed for 2–3 minutes until the butter becomes light, creamy, and slightly paler in color.
This step incorporates air and sets the foundation for fluffy frosting. Pause to scrape down the bowl so no butter clings to the sides.
2. Add Powdered Sugar Gradually
- Turn the mixer to low and add powdered sugar one cup at a time.
- After each addition is mostly incorporated, increase speed to medium and beat for about 1 minute.
Use around 3 cups for a softer, less sweet buttercream, or closer to 4 cups for a firmer, sweeter frosting that holds shape well for piping.
3. Mix in Vanilla and Salt
- Add the vanilla extract and a pinch of salt (if using).
- Beat until fully combined, scraping the sides and bottom of the bowl as needed.
The vanilla gives the buttercream its classic bakery-style aroma and taste, while the salt prevents it from tasting overly sweet.
4. Incorporate Milk or Cream
- With the mixer on low, add milk or heavy cream 1 tablespoon at a time.
- After each addition, increase speed to medium-high and beat for 30–60 seconds.
Adjust the amount of liquid based on how you plan to use the frosting:
- For spreading: Slightly softer, more spreadable consistency.
- For piping and decorations: Thicker frosting that still moves easily through a piping bag.
Once you reach the desired texture, beat for another 2–3 minutes to maximize fluffiness.
5. Fine-Tune the Consistency
- If the frosting is too thick, add a small splash of milk or cream and beat again.
- If it’s too thin, add a bit more powdered sugar and mix until smooth.
The finished buttercream should be smooth, airy, and hold soft peaks without feeling stiff or greasy.
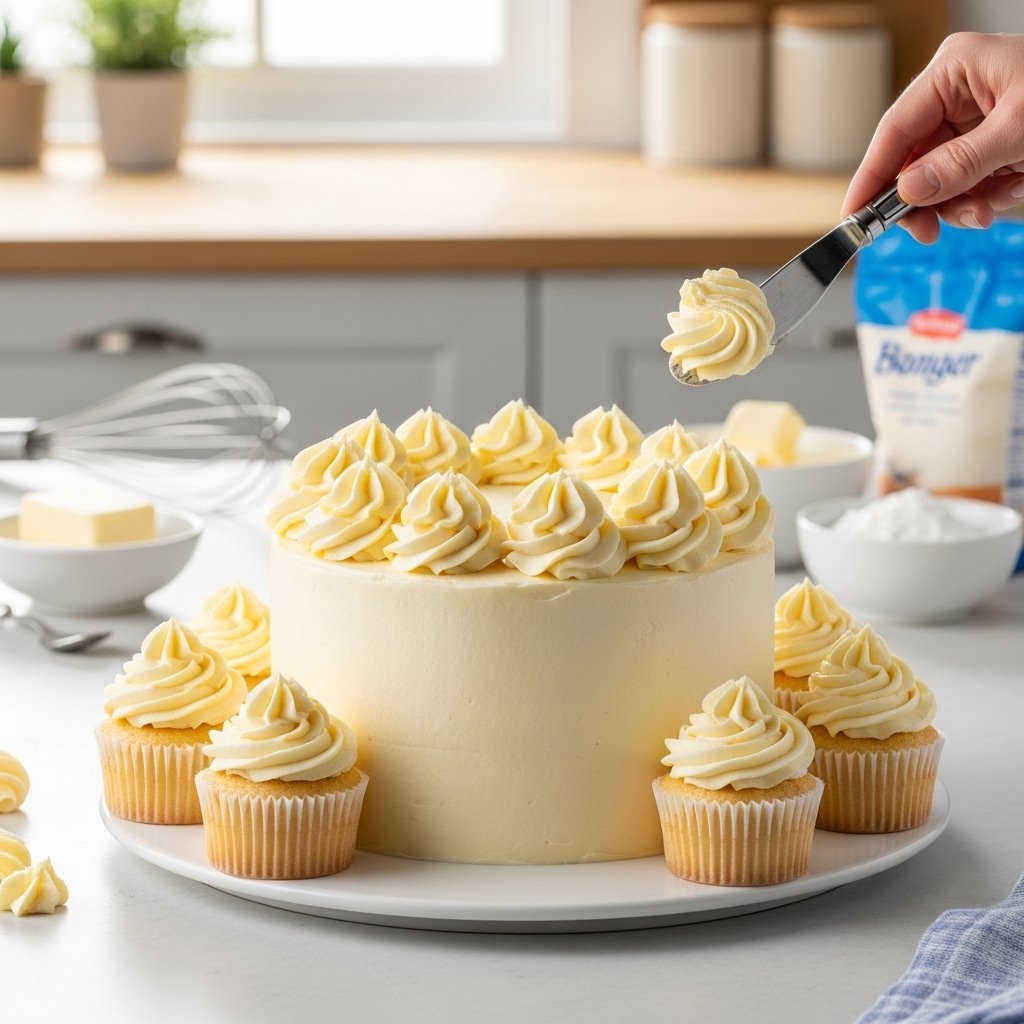
How to Use Basic Buttercream
This versatile frosting works beautifully for:
- Layer cakes: Spread between layers and cover the outside for a smooth or rustic finish.
- Cupcakes: Pipe swirls, rosettes, or ruffles using different piping tips.
- Cookies: Spread or pipe onto sugar cookies, sandwich cookies, or bar cookies.
- Brownies and bars: Add a generous layer on top for extra sweetness.
- Crumb coats: Apply a thin first layer to trap crumbs before adding a final, cleaner coat.
Decorating Tips
- Use piping bags with star or round tips for simple, professional-looking designs.
- Add gel-based food coloring for vivid colors without thinning the frosting.
- Decorate with sprinkles, edible glitter, or colored sugar for added flair.
- For sharp edges on cakes, chill the crumb-coated cake briefly, then apply a final layer of buttercream.
Expert Tips for Perfect Buttercream Every Time
- Use room-temperature butter: Let it sit out for at least 30 minutes (longer if your kitchen is cool). It should be slightly cool but easily pressed with a finger.
- Sift powdered sugar: This helps remove lumps, resulting in an ultra-smooth finish.
- Beat longer than you think: Extra mixing time (within reason) makes buttercream lighter and fluffier.
- Adjust flavor extracts: Swap vanilla for almond, lemon, orange, or coconut extract for easy flavor twists.
- Change consistency slowly: Add liquid or sugar in small amounts (a teaspoon or tablespoon at a time) for controlled adjustments.
- Stabilize for warm weather: Incorporating a small amount of vegetable shortening can help the frosting hold its shape in heat.
Troubleshooting Common Buttercream Issues
Frosting too thick
- Add a bit more milk or cream, a teaspoon at a time, and beat until smooth.
Frosting too thin
- Add more powdered sugar gradually.
- You can also refrigerate the bowl briefly, then re-whip to firm it up.
Grainy texture
- Usually due to unsifted sugar or too-cold butter.
- Make sure sugar is sifted, butter is properly softened, and beat the frosting longer.
Weeping or separation
- Can happen if the butter is too cold or if too much liquid is added in one go.
- Let the frosting sit at room temperature, then beat again until it comes back together.
Too many air bubbles
- Beat at a lower speed toward the end to reduce air pockets.
- You can also use a spatula or paddle attachment to press out bubbles by stirring slowly.
Storing and Making Buttercream Ahead
Buttercream stores well, making it perfect for advance prep.
Room Temperature
- If your kitchen is cool, you can keep buttercream in an airtight container at room temperature for up to 2 days.
- Keep it covered to prevent a crust from forming.
Refrigeration
- Store in the refrigerator for up to 1 week.
- Before using, let it come back to room temperature and then re-whip to restore its airy texture.
Freezing
- Buttercream can be frozen for up to 3 months.
- Place in a tightly sealed container, label with the date, and freeze.
- Thaw overnight in the refrigerator, bring to room temperature, and beat again until smooth and fluffy.
Best practice: Press plastic wrap directly onto the surface of the frosting before sealing the container to minimize air exposure and prevent drying.
Avoid softening buttercream in the microwave, which can create uneven hot spots and affect texture. Let it warm gradually at room temperature.
Flavor and Color Variations
Once you’ve made your base buttercream, customize it in endless ways.
Flavor Ideas
- Chocolate buttercream:
- Add unsweetened cocoa powder (start with ¼–½ cup) and additional milk as needed.
- Or blend in cooled melted chocolate for a richer, smoother chocolate flavor.
- Berry buttercream:
- Mix in finely ground freeze-dried fruit powder (strawberry, raspberry, etc.).
- Or fold in a thick fruit puree, adjusting powdered sugar to maintain structure.
- Citrus buttercream:
- Add lemon, lime, or orange zest and a small amount of citrus juice.
- Pair with vanilla or use citrus extract for extra punch.
- Coffee buttercream:
- Dissolve instant espresso powder or strong brewed coffee into the milk before adding it to the frosting.
- Nutty flavors:
- Substitute part of the vanilla with almond or coconut extract.
- For more intensity, add a spoonful of nut butter or finely ground nut paste.
Coloring Buttercream
- Prepare your base frosting.
- Add a tiny amount of gel-based food coloring using a toothpick or dropper.
- Beat until the color is fully and evenly incorporated.
- Adjust gradually until you reach the shade you want.
For multi-colored designs, divide the frosting into separate bowls and tint each portion individually.sy to adjust, works for any batch size, and everyone loves it. Try it once, and you’ll be piping like a pro.
Frequently Asked Questions
How do you make perfect buttercream frosting from scratch?
Beat softened butter, gradually add sifted powdered sugar, vanilla, salt, and cream. Whip 3–4 minutes for fluffiness.
Why is my buttercream frosting grainy?
Graininess comes from unsifted powdered sugar. Sift twice, then beat on medium-high speed until smooth.
Can you make buttercream frosting ahead of time?
Yes, you can store it in the fridge for up to 2 weeks or freeze it for 3 months. After thawing, whip it again for the best texture.
What’s the best butter for buttercream frosting?
Use unsalted butter softened to room temperature for creamy, pipeable frosting without sogginess.
How much buttercream frosting for a cake?
Four cups of frosting will generously cover a 9-inch two-layer cake. Double the recipe if you want thicker layers or to cover the sides.