How to Prepare Blackberry Bushes for Winter
How to Prepare Blackberry Bushes for Winter
With the right winter preparation, blackberry bushes can grow strong and produce plenty of fruit. This guide offers simple steps to help your plants stay healthy and productive.
Protecting blackberries over winter keeps their roots and canes safe from frost. Well-cared-for bushes can produce berries for many years.
Why Overwinter Blackberries
Blackberries are tough garden fruits, but very cold weather can still harm their new growth and roots.
Preparing for winter helps blackberries survive in zones 4 through 9 and promotes strong growth in spring.
If you skip winter prep, your plants may produce less fruit. Taking care of them now helps them stay as strong as wild brambles.
Know Your Blackberry Types
Trailing blackberries need a bit more attention. Lay their canes flat on the ground to protect them from freezing and thawing.
Upright types are better suited to the chill. They handle winds better with minimal aid.
Semi-erect hybrids have a mix of traits. Monitor how your plants grow to determine what care they need.
Timing Your Winter Prep
Begin your winter prep after harvesting, but before the first hard frost. Late fall, when leaves begin to fall, is the best time.
Wait too long, and brittle canes snap. Early action locks in moisture before the ground freezes.
In warmer areas, you can continue into November. Check your local frost dates to be sure.
Step 1: Thorough Cleanup
Rake away any fallen leaves from around the base of your bushes. Old leaves and debris can attract pests and diseases, such as anthracnose.
Pull out any weeds that compete with your blackberries for space. Make sure there is good airflow around the canes.
Burn or compost the debris somewhere away from your blackberry patch. This can reduce the risk of disease by up to 70%.
Step 2: Smart Pruning Cuts
Learn to tell primocanes from floricanes. Floricanes are the canes that produced fruit this year, so cut them down to the ground.
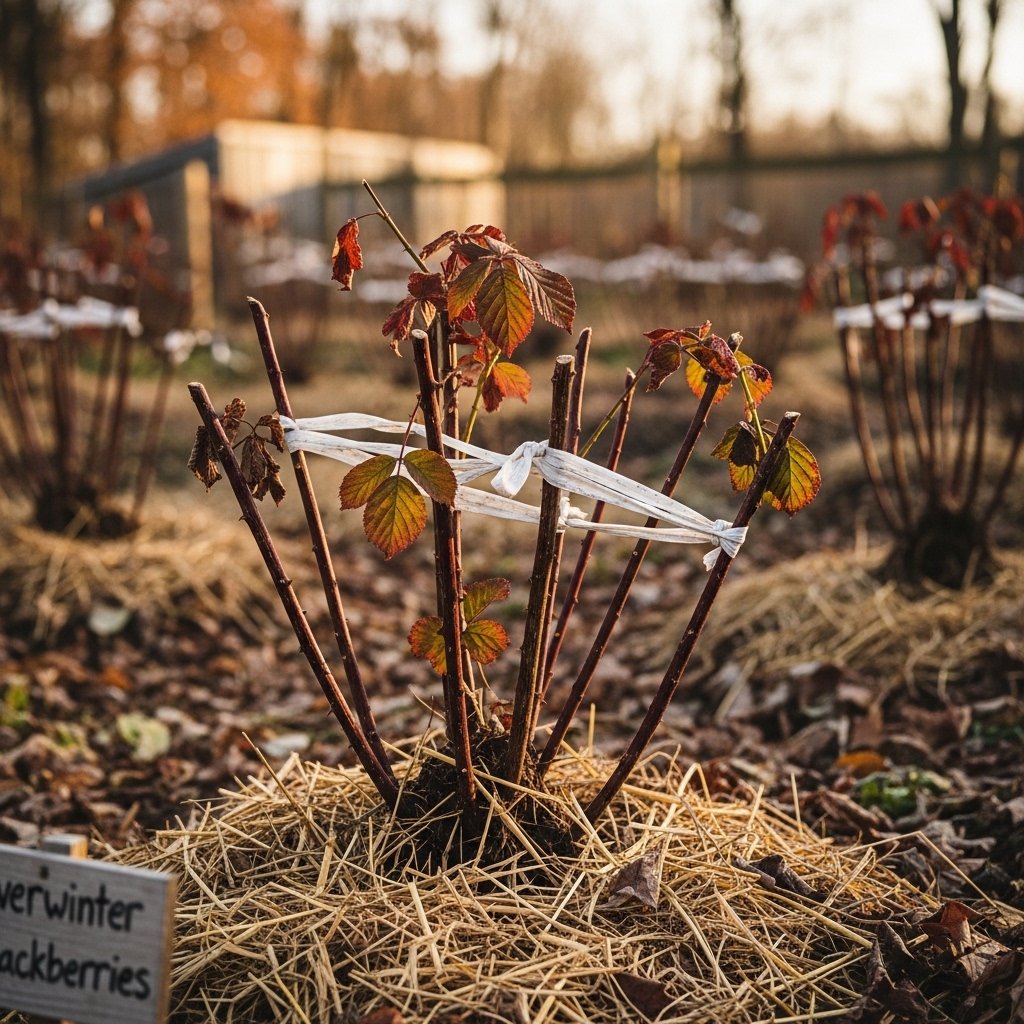
Keep only 4 to 6 strong primocanes per foot, and remove any that are weak, diseased, or damaged.
Use sharp bypass pruners at 45-degree angles. Seal large cuts with tree wound dressing.
Step 3: Trellis Management
Unfasten trailing canes from their wires and gently lower them to the ground, being careful not to bend them too much.
Keep upright bushes attached to their trellises. Tighten any loose ties so the wind doesn’t shake them.
Check your supports for rust and make sure the posts are set at least two feet deep for stability.
Step 4: Wind Protection Tactics
Put up burlap screens on the north side of your plants to block cold winds that can dry out the canes.
Plant evergreens as living windbreaks. Space 10 feet from bushes for root harmony.
Don’t use solid fences, as they can trap excessive snow. Choose barriers that let about half the wind through.
Step 5: Water Deeply Before Freeze
Saturate the soil one week pre-frost. Dry roots crack in frozen ground.
Use drip irrigation to moisten the soil evenly. Avoid watering from above, as this can cause rot.
Giving your plants a final deep watering helps protect them from the cold even more than snow cover does.
Step 6: Heavy Mulch Layering
Apply 4-6 inches of straw or chopped leaves. Pile around base, not touching canes.
Extend the mulch out about two feet from the base. This helps keep the soil temperature steady and prevents weeds.
Refresh annually. Organic mulch breaks down into nutrient-rich humus.
Step 7: Cane Positioning Tricks
For trailing varieties, lay canes on a straw bed—pin with U-shaped wires, not rocks.
In zone 5 or colder, cover the canes with extra mulch and mound about six inches of soil over the crowns.
Upright canes bend slightly earthward. This sheds heavy snow buildup.
Step 8: Container Blackberry Care
Move potted blackberries to an unheated garage or shed, and group them to retain warmth.
Group in trenches if outdoors. Mulch tops thickly; water sparingly.
In spring, gradually move your plants back outside so they acclimate to the sun and avoid shock.
Cold-Hardy Cultivars to Choose
Choose ‘Illini Hardy’ if you live in zone 4. This variety can handle temperatures as low as -20°F.
‘Chester’ is a good upright variety for zone 6. It is thornless, making it easy for families to pick.
‘Darrow’ delivers flavor punch. Test soil pH at 6.0-6.5 for best uptake.
Common Overwintering Mistakes
If you prune too much, your plants may become weak. Always leave enough primocanes for next year’s fruit.
Shallow mulch invites vole damage. Go thick to deter burrowing pests.
If your soil does not drain well, roots can get flooded. Before planting, mix compost into clay soil to improve drainage.
Spring Wake-Up Routine
Uncover post-last frost. Lift canes gently; retie to trellises.
Rake old mulch; add compost refresh—scout for rodent chew marks.
Use a small amount of 10-10-10 fertilizer. Also, monitor for emerald ash borers in your area.
Blackberries reward diligent winter care. Expect doubled yields from protected plants.
FAQs
When should I prune blackberries for winter?
Prune after harvest, before frost, cutting fruited floricanes to the ground.
Do upright blackberries need winter covering?
Upright types need mulch only; add windbreaks in exposed spots.
How much mulch for overwintering blackberries?
Use 4-6 inches of straw or leaves around bases for root insulation.
Can I grow blackberries in pots through winter?
Yes, move pots to sheltered spots with thick mulch on the soil surface.
What if my blackberries are in zone 4?
Choose hardy varieties like Illini Hardy; bury trailing canes deeply.