11 Tips For Growing Chrysanthemums in Pots
11 Tips For Growing Chrysanthemums in Pots
Container mums are the workhorses of fall color: inexpensive, wildly floriferous, and surprisingly versatile when you know how to treat them like more than disposable decor. Whether you’re setting up a polished front-porch display or want long-lasting color on a balcony, mastering a few key details will turn those grocery-store pots into show-stopping container mums that last for weeks instead of days. In this guide, you’ll learn 11 expert tips for gorgeous potted mums, from choosing the right plants to overwintering them for another year of blooms.
What Makes Container Mums Different?
Container mums (chrysanthemums grown in pots or decorative planters) are bred and grown for dense, dome-shaped blooms and compact form. They’re shallow-rooted, which makes them perfect for containers but also more vulnerable to drying out and temperature swings. Because most mums are sold at or near peak bloom, how you handle them in the first 24–48 hours—repotting, watering, and placement—largely determines how long they’ll look good.
Tip 1: Choose the Right Type of Mum
Not all mums behave the same way in pots, and knowing the difference helps manage expectations.
- Garden (hardy) mums are bred to survive winter in the ground and can sometimes be overwintered after their stint in containers.
- Florist (floral) mums are often used as indoor plants and are less cold-hardy; they’re excellent for short-term displays but rarely perennial outdoors in cold climates.
When shopping, look for plants labeled “garden mums” or “hardy mums” if you plan to overwinter or plant them out later, and “florist mums” if you only need a temporary burst of color indoors. Whichever type you choose, prioritize plants with plenty of tight buds rather than fully open blooms, as they’ll give you a longer display.
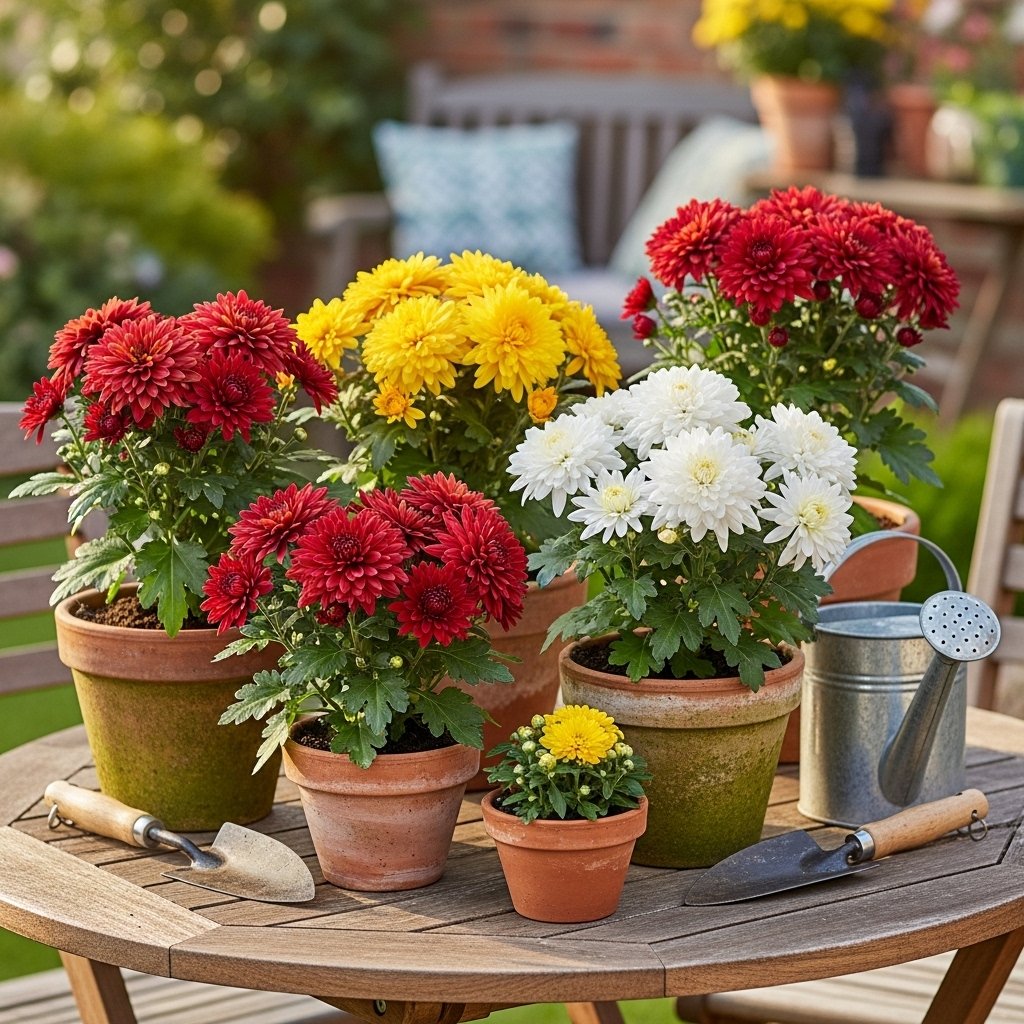
Tip 2: Select a Proper Container (Size and Drainage)
A common mistake is leaving mums crammed into their nursery pots, where roots are already crowded and dry out quickly. For outdoor displays, choose a container 5–8 cm (2–3 inches) wider than the nursery pot, with at least one large drainage hole. Shallow but wide containers work well because mums have relatively short root systems.
Good drainage is non-negotiable: mums hate “wet feet,” and waterlogged soil leads quickly to root rot and collapsing plants. If your decorative pot lacks holes, either drill some or use it as a cachepot with a plastic grower pot nested inside and remove excess water after irrigation.
Tip 3: Repot Immediately for Longer Life
If you want container mums to last more than a week or two, repotting is one of the highest-impact steps you can take.
Here’s the basic process:
- Gently slide the plant out of the nursery pot.
- Loosen the root ball with your fingers to untangle circling roots.
- Place it into the new container so the top of the root ball sits about 2–3 cm below the rim.
- Backfill with fresh potting mix, firming lightly.
- Water thoroughly until excess drains from the bottom.
Repotting gives the plant fresh nutrients, better moisture retention, and space for roots to expand, which translates into more sustained blooming and less stress.
Tip 4: Use the Right Potting Mix
Mums prefer a moist but well-drained, fertile medium—heavy garden soil in containers is a recipe for problems. Choose a high-quality potting mix designed for containers or flowering plants, then improve it by:
- Adding compost for slow-release nutrients.
- Mixing in perlite or coarse sand to improve drainage if the mix is dense.
- Avoiding straight topsoil or unamended garden soil, which compacts and stays too wet.
This balance of fertility and drainage keeps buds developing without drowning delicate roots.
Tip 5: Give Container Mums Enough Sun
Mums are sun-lovers and respond to good light with strong stems and abundant flowers. Aim for at least 4–6 hours of direct sun per day outdoors; morning sun with light afternoon shade often works best, especially in hotter regions. Too much shade results in weak, leggy growth and fewer, smaller blooms.
Indoors, place potted mums in the brightest possible spot—a south- or west-facing window is ideal. Keep them away from hot radiators or forced-air vents that can dry them out quickly and shorten bloom life.
Tip 6: Master Watering (The Make-or-Break Factor)
Overwatering kills more potted mums than cold weather, while underwatering can cause wilting and prematurely spent blooms. The goal is consistently moist—not soggy—soil.
A simple, reliable method:
- Check soil daily by inserting your finger about 2–3 cm deep. Water only when it feels slightly dry at that depth.
- Water slowly at the base of the plant until water runs from the drainage holes.
- Empty saucers within 15 minutes so roots don’t sit in standing water.
In warm, windy fall weather, you may need to water outdoor container mums every day; in cooler, overcast conditions, every 2–3 days may be plenty. Indoors, expect slightly less frequent watering, but still monitor closely—central heating can dry containers surprisingly fast.
Tip 7: Feed Strategically (Or Not At All)
For mums already in full bloom used as seasonal decor, heavy fertilizing isn’t essential and can even push soft, leafy growth at the expense of flowers. If the plant will be in its pot for more than 4–6 weeks, a light feeding with a balanced, water-soluble fertilizer every 2–4 weeks can support continued bud formation, especially if it was repotted into a lean mix.
However, if you bought mums at peak color for a short-term display, fresh potting mix alone may provide enough nutrients; in this case, focus on water and light, and skip the fertilizer.
Tip 8: Deadhead and Groom for Continuous Color
Deadheading—removing spent blooms—encourages mums to channel energy into new buds instead of seed production.
- Snip or pinch off the entire faded flower back to a leaf node, not just the browned petals.
- Remove any yellowing or diseased foliage promptly to improve airflow and reduce disease risk.
A quick weekly grooming session keeps container mums looking crisp and can extend the overall bloom period by several weeks.
Tip 9: Protect from Weather Extremes
Container mums are more exposed to temperature swings than in-ground plants because roots are closer to the surface. To keep them looking their best:
- Shield them from driving rain, which can flatten blooms and waterlog the soil.
- Move pots during early frosts to a sheltered porch, garage, or indoor spot overnight.
- Rotate containers every few days so all sides receive even light and grow symmetrically.
Materials also matter: terracotta, concrete, and resin containers offer better insulation and stability for outdoor mums than thin plastic alone.
Tip 10: Plan for Overwintering (If You Want Them Back)
Whether you can keep container mums alive over winter depends on your climate, the mum type, and timing. Hardy garden mums planted into the ground in early fall have the best chance of returning the following year.
A common approach:
- After the first hard frost, cut stems back to about 10–15 cm.
- In milder climates, mulch heavily around the base if planted in the ground.
- In colder climates, move the container to an unheated but frost-free area like a garage or cold basement, water very lightly once a month to prevent complete desiccation, and keep it dark and cool.
Florist mums or very late-season purchases are often best treated as annuals, but if you have space, experimenting with overwintering can be rewarding—success rates improve when plants are established earlier in the season.
Tip 11: Design Smarter Displays with Companion Plants
Container mums shine brightest when they’re part of a layered, textural display rather than a lone ball of color. Combine them with other cool-season container plants that like similar conditions, such as ornamental kale, pansies, violas, heuchera, and dwarf grasses.
Use these design tricks for professional-looking fall containers:
- Follow the “thriller, filler, spiller” formula, with mums as the main “filler” or even “thriller” in the center.
- Repeat colors across multiple pots to create a cohesive look on steps or patios.
- Vary bloom sizes and foliage textures so the display still looks interesting when some flowers fade.
Thoughtful combinations can stretch the life of your display since companion plants often outlast the mums and keep containers attractive.
Quick-Start Checklist for Thriving Container Mums
For readers who want a fast reference, here is a condensed checklist based on the tips above:
- Choose hardy garden mums if you might overwinter; pick plants with more buds than open flowers.
- Repot into a slightly larger container with excellent drainage and high-quality potting mix.
- Provide 4–6 hours of direct sun outdoors or the brightest window indoors.
- Water when the top 2–3 cm of soil is dry; avoid waterlogged soil and empty saucers.
- Deadhead spent blooms and remove damaged foliage weekly.
- Protect from heavy rain, strong wind, and early frosts; rotate pots regularly.
- Decide early whether to treat them as seasonal annuals or attempt overwintering.
FAQ Section
1. How long do container mums last in pots?
With good light, consistent moisture, and regular deadheading, a healthy container mum can bloom for 6–8 weeks, sometimes longer if you start with a plant packed with tight buds.
2. Should I bring my potted mums inside at night?
You don’t need to bring them in for normal cool fall nights, but it is wise to move pots to a sheltered spot when temperatures approach freezing or when hard frosts are forecast, especially for florist mums.
3. Can I plant my container mums in the ground after fall?
Yes, hardy garden mums can be transplanted into the garden; they have the best survival odds when planted at least 6 weeks before the ground freezes so they can establish roots before winter.
4. Why are my potted mums turning brown quickly?
Rapid browning is usually due to either underwatering (soil drying out completely between waterings) or overwatering (soggy roots causing rot), sometimes combined with too much heat or sun hitting the pot sides.
5. Do mums need fertilizer in containers?
Light, occasional feeding can help if the plant will be in its pot for more than a month, but it’s not essential for short-term displays; repotting into fresh, fertile mix and managing water usually matter more.